Documentation plays a crucial role in software development, and having well-organized, accessible documentation is key to collaboration and productivity. With the powerful combination of DocuWriter.ai and Notion, you can effortlessly export your automatically generated Markdown code documentation and manage it within your team’s favorite workspace.
In this tutorial, we’ll walk you through the process of exporting Markdown code documentation from DocuWriter.ai and importing it into Notion.
Prerequisites 📝
Before you begin, make sure you have the following:
- A DocuWriter.ai account with a project containing your code documentation
- A Notion account and workspace where you’d like to import your documentation
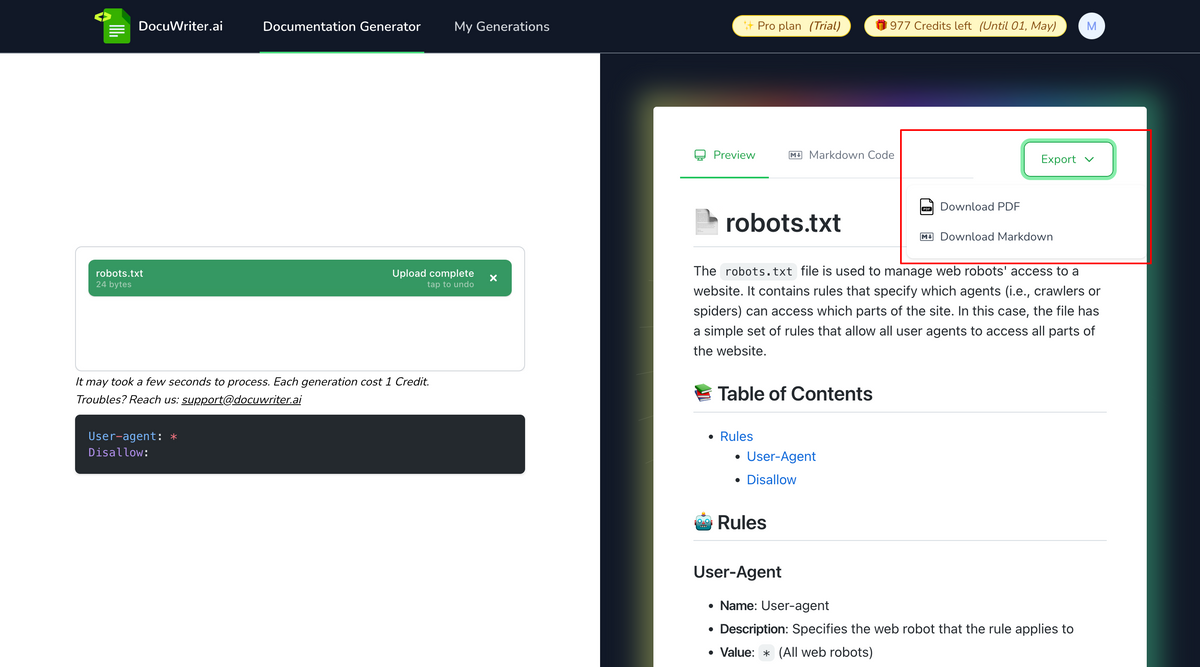
Step 1: Generate and Export Markdown Code Documentation in DocuWriter.ai 📥
- Log in to your DocuWriter.ai account.
- Once your code documentation is generated, click on the “Export” button. (You can also Export files from “My Generations” table)
- Select “Download Markdown” from the export options.
- Save the Markdown file to your desired location on your computer.
💡 Not using DocuWriter.ai yet? Sign up now and revolutionize your code documentation process!
Step 2: Prepare Your Notion Workspace 🌐
- Log in to your Notion account and navigate to the workspace where you want to import your code documentation.
- Create a new page or select an existing one where you’d like to add the documentation.
- In the page, click on the ”+ Add a new block” button and select “Import” from the list of options.
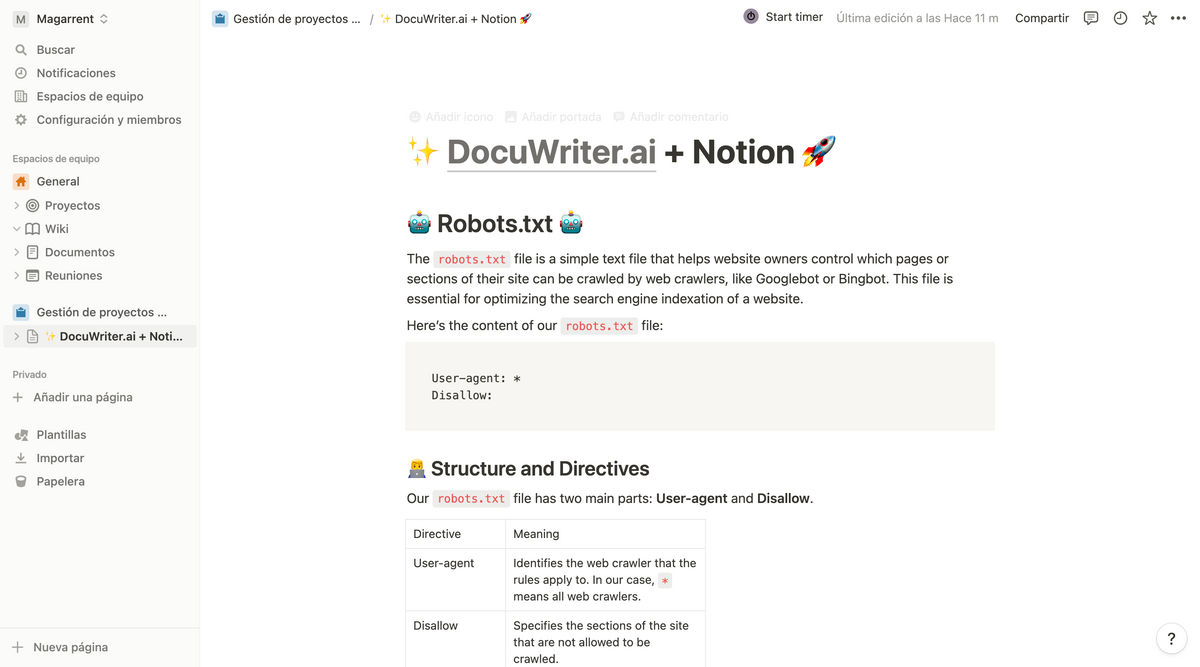
Step 3: Import Markdown Documentation into Notion 📄
- In the Import modal, select “Markdown” as the file format.
- Click on “Upload” and choose the Markdown file you exported from DocuWriter.ai.
- Once the upload is complete, Notion will automatically convert the Markdown content into Notion blocks, maintaining the formatting and structure of your code documentation.
Step 4: Organize and Customize Your Documentation in Notion 🎨
Now that your documentation is in Notion, you can further organize and customize it according to your team’s needs:
- Use Notion’s drag-and-drop functionality to rearrange sections, headings, and blocks.
- Add tags, labels, or comments to your documentation for better organization and collaboration.
- Customize the look and feel of your documentation with Notion’s rich text formatting options, such as fonts, colors, and styles.
Conclusion 🏁
By exporting your Markdown code documentation from DocuWriter.ai and importing it into Notion, you can create a centralized hub for all your software development documentation. This seamless integration helps your team collaborate more effectively, maintain up-to-date documentation, and ensure a smoother development process.
Experience the power of DocuWriter.ai and Notion today, and revolutionize the way you manage your code documentation.
🔥 Ready to supercharge your code documentation? Get started with DocuWriter.ai now!